Testing the firewall #
This page describes how to test all the currently implemented functionalities of the firewall. The tests are for the QEMU platform, to be run inside the provided Docker container, however similar commands and tests can be used for a real hardware setup.
Testing the QEMU image in Docker #
The following commands reference environment variables set using the
configuration script firewall_configuration.sh. If you are running the
commands inside the container, these variables should already be
set.
Many of the tests described on this page have been automated using the
autotest.sh script described here. The script itself can
be found in the the Docker scripts directory examples/firewall/docker/scripts.
Namespaces #
To force internally generated docker traffic to flow through the firewall, we
create two isolated network namespaces named ext (external) and int
(internal). Each namespace has only two routes - a local subnet route and a
default route to the firewall’s local gateway IP address. Thus, all non-local IP
traffic is forwarded to firewall.
To execute a command from within a namespace, you prepend the command with the following prefixes:
# Execute from ext namespace
ip netns exec ext

# Execute from int namespace
ip netns exec int
Namespace routes can be listed using the ip route command:
root@db756615e5c4:/# ip netns exec ext ip route
default via 172.16.2.1 dev ext-br0
172.16.0.0/12 dev ext-br0 proto kernel scope link src 172.16.2.200
Namespace network interface information can be displayed using the ifconfig
command:
root@db756615e5c4:/# ip netns exec ext ifconfig
ext-br0: flags=4163<UP,BROADCAST,RUNNING,MULTICAST>  mtu 1500
        inet 172.16.2.200  netmask 255.240.0.0  broadcast 0.0.0.0
        inet6 fe80::f0ad:22ff:feaa:4014  prefixlen 64  scopeid 0x20<link>
        ether f2:ad:22:aa:40:14  txqueuelen 1000  (Ethernet)
        RX packets 39  bytes 10754 (10.7 KB)
        RX errors 0  dropped 0  overruns 0  frame 0
        TX packets 59  bytes 16542 (16.5 KB)
        TX errors 0  dropped 0 overruns 0  carrier 0  collisions 0
Forwarding traffic through the firewall #
The following commands test the ability of the firewall to route and filter traffic between networks. This actually tests many components of the firewall including but not limited to:
- The ARP responder component, which must be replying correctly for the firewall’s IP address to be matched to its MAC address
- The corresponding filter component, which must be applying its rules correctly to allow or deny the traffic (rules can be configured using the firewall’s GUI)
- The routing component, which must be correctly identifying the route to the destination subnet
- The ARP requester component, which must be sending out ARP requests for the destination IP, and receiving and processing responses
Additionally successful traffic flow also verifies that the ethernet drivers and network virtualisers are working correctly.
ICMP #
To forward a ping through the firewall, execute the following commands:
# ICMP: ext --> int
ip netns exec ext ping ${INT_HOST_IP}

# ICMP: int --> ext
ip netns exec int ping ${EXT_HOST_IP}
TCP #
To test the forwarding of UDP and TCP traffic, we utilise the netcat program.
To create a TCP connection between the two hosts on different namespaces one
host must listen on a port, and the other must initiate a connection on the same
port:
# TCP: ext listens, int initiates
ip netns exec int nc -l ${TEST_PORT}
ip netns exec ext nc ${INT_HOST_IP} ${TEST_PORT}

# TCP: int listens --> ext initiates
ip netns exec ext nc -l ${TEST_PORT}
ip netns exec int nc ${EXT_HOST_IP} ${TEST_PORT}
Once the connection is established, input entered into one terminal should be received by the other host, and be outputted on the other terminal.
UDP #
UDP is essentially the same as TCP, with an additional netcat -u flag
specifying UDP:
# UDP: ext listens, int initiates
ip netns exec int nc -ul ${TEST_PORT}
ip netns exec ext nc -u ${INT_HOST_IP} ${TEST_PORT}

# UDP: int listens --> ext initiates
ip netns exec ext nc -ul ${TEST_PORT}
ip netns exec int nc -u ${EXT_HOST_IP} ${TEST_PORT}
Testing the ICMP module #
Destination unreachable #
Currently the ICMP module is only
capable of sending destination unreachable packets, which are sent to the source IP address of packets when
the destination IP address of a packet can’t be resolved. To test this, you can
attempt to ping an IP address that doesn’t exist:
ip netns exec ext ping ${INT_BAD_HOST_IP}
ip netns exec int ping ${EXT_BAD_HOST_IP}
Initially this will cause the ARP requester to send out an ARP request for the bad IP. The requester will retry a total of 5 times (once per second), until it eventually decides the IP is unreachable. It will then notify the router about this, which will trigger the router to send a request to the ICMP module to send an ICMP ‘destination unreachable’ packet back to the original sender. This should result in your ping command outputting the following:
root@db756615e5c4:~# ip netns exec ext ping ${INT_BAD_HOST_IP}
PING 192.168.1.101 (192.168.1.101) 56(84) bytes of data.
From 172.16.2.1 icmp_seq=1 Destination Host Unreachable
From 172.16.2.1 icmp_seq=2 Destination Host Unreachable
From 172.16.2.1 icmp_seq=3 Destination Host Unreachable
From 172.16.2.1 icmp_seq=4 Destination Host Unreachable
From 172.16.2.1 icmp_seq=5 Destination Host Unreachable
Monitoring traffic and debugging #
Traffic can be monitored as it travels through the firewall through the use of debug printing, which by default is turned on. Each component of the firewall prints as it processes a packet with details of how the packet is being processed, as well as destination and source IP and MAC address.
In addition, you can use tcpdump on each virtual interface within the
container, with some interfaces only being accessible from within the internal
or external namespaces. Starting from the veth connected to the external name
space in the external -> internal direction, the following tcpdump commands
can be used:
# TCP dump interfaces (e - include ethernet, x - hexdump packet, -i interface)

# veth attached to the external namespace
ip netns exec ext tcpdump -ex -i ext-br0

# veth attached to the external bridge
tcpdump -ex -i br0-ext

# external bridge
tcpdump -ex -i br0

# external tap of the firewall
tcpdump -ex -i tap0

# internal tap of the firewall
tcpdump -ex -i tap1

# internal bridge
tcpdump -ex -i br1

# veth attached to the internal bridge
tcpdump -ex -i br1-int

# veth attached to the internal namespace
ip netns exec int tcpdump -eX -i int-br1
Using these commands allows you to trace traffic through the virtual network, and can be particularly useful if you find your traffic getting stuck somewhere.
Automated testing #
An automated testing script is available in the docker/scripts directory; it
performs much of the testing described above.
Running the script #
Prerequisites:
- Firewall is running within the Docker container as specified here
First, in the Docker container shell, change your working directory to the
script’s location: examples/firewall/docker/scripts.
Once there, we can execute
./autotest.sh
and the test suite will run.
Running specific tests #
Running the autotest.sh script on its own will execute all enabled tests;
however, you can also run tests individually by specifying the test’s name:
./autotest.sh -- test_icmp_ping_host_internal_to_external
Alternatively, several tests’ names can be specified, and only those tests will be executed:
./autotest.sh -- test_tcp_internal_to_external test_tcp_external_to_internal
test_udp_internal_to_external test_udp_external_to_internal
Enabling firewall log output #
If the firewall has debug printing enabled, the debug messages that are generated during a test can be output on test failure.
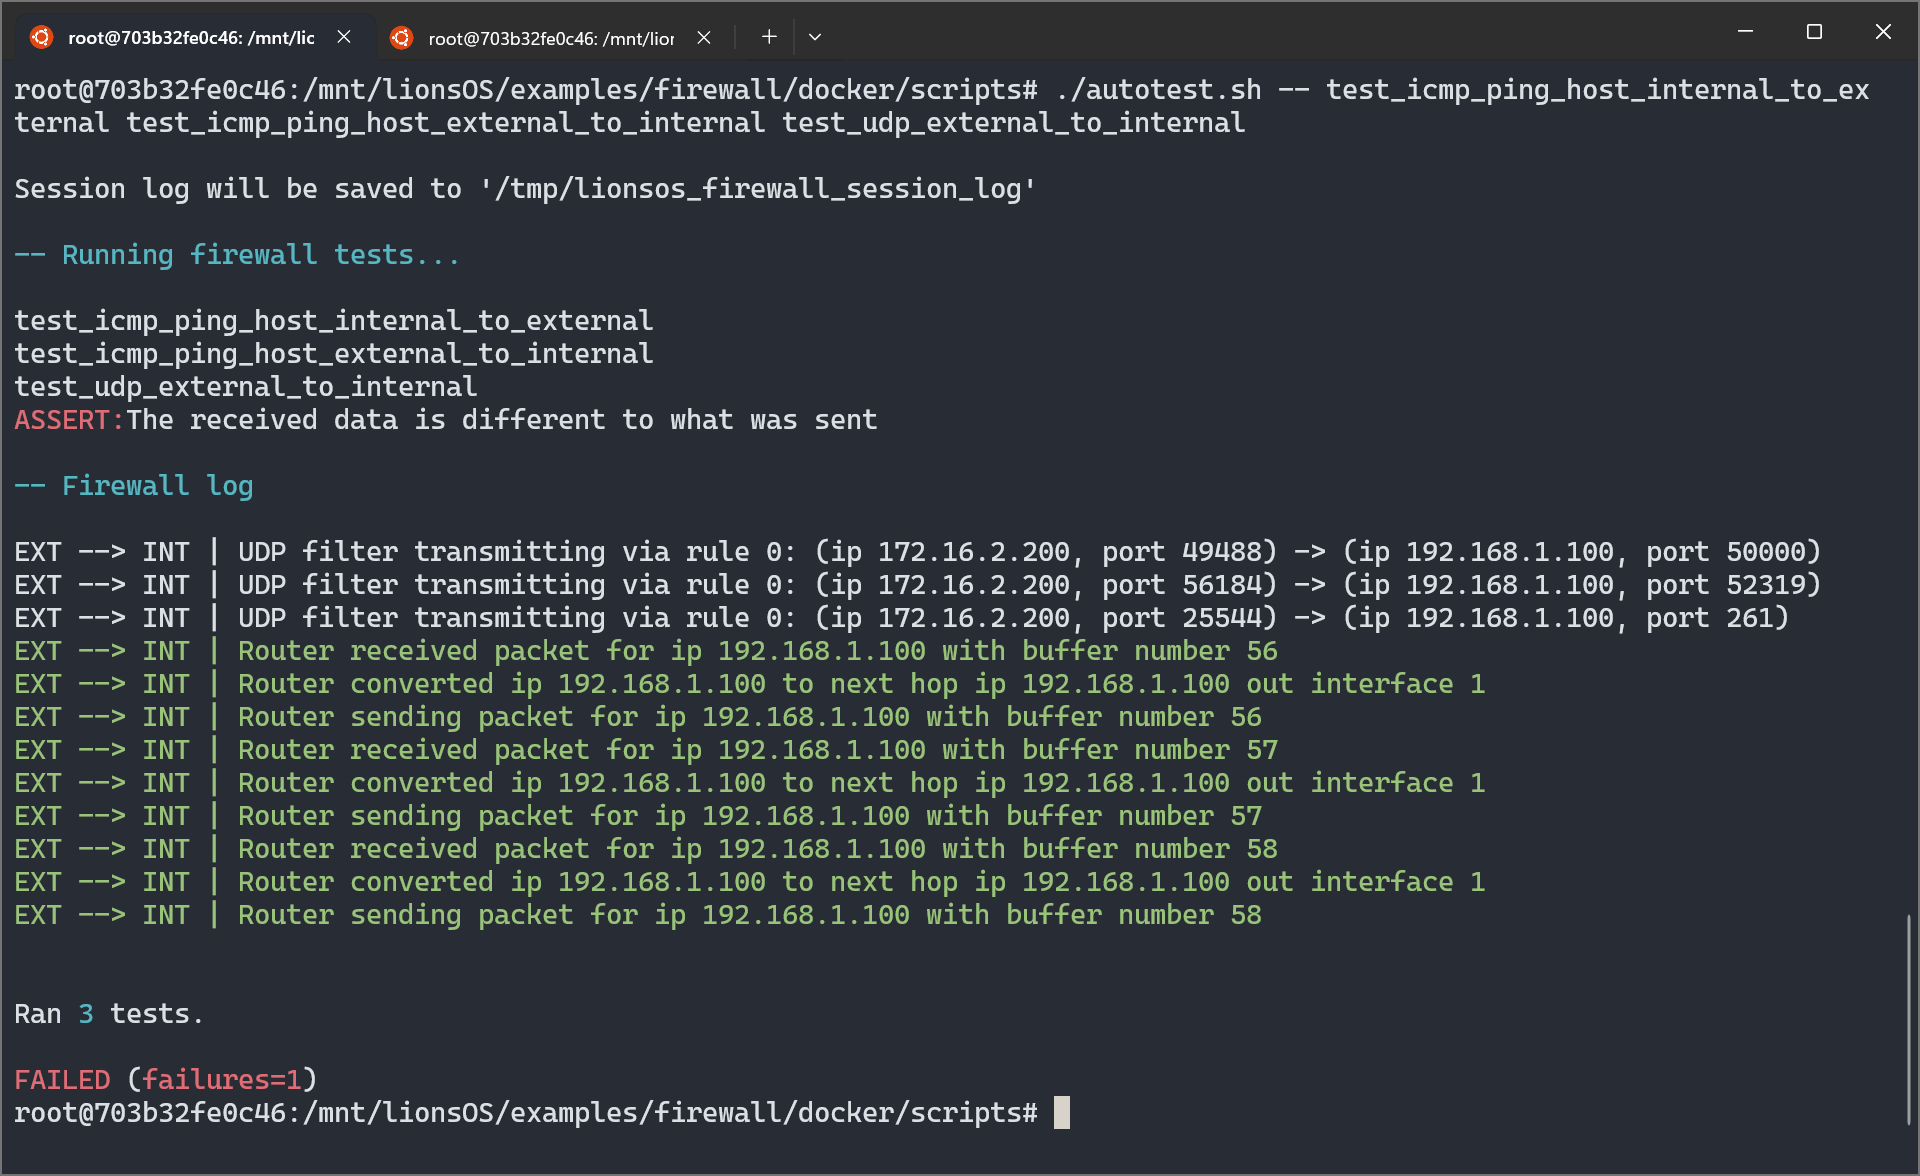
To enable this feature, edit autotest.sh and set PRINT_LOG_ON_ERROR to
true (note: this is the default). Before the log will be printed, you must
redirect the firewall’s output to a known location. In the script’s default
configuration, the log is expected to be read from /tmp/lionsos_firewall_log.
Output from the qemu.sh script can be redirected to this location,
./qemu.sh > /tmp/lionsos_firewall_log
or you can use tee to simultaneously receive console output while updating the
log file.
./qemu.sh | tee /tmp/lionsos_firewall_log
If additional context is required, a session log can be generated, which
contains the logs from all executed tests. Once firewall output has been
redirected to the log file, setting SAVE_SESSION_LOG_ON_EXIT to true will
cause a session log to be written to SESSION_LOG after the test suite has
finished (the default location is /tmp/lionsos_firewall_session_log). (Note:
The session log will be clobbered at the start of each test suite run; however,
this is configurable).
Additional configuration #
Many aspects of the script can be configured (some examples include the test ports used, the duration of timeouts, the location of temporary files, and the display of network interface and route information on startup).
These additional options are documented in the script’s source code. For example, here are the options and documentation for data transmission tests:
# Test data
#
# For tests that transfer data, random data can be generated or fixed data
# can be supplied. Setting `USE_RANDOM_DATA` to true will generate random
# data at a specified `SIZE_BYTES`.
TEST_DATA='/tmp/firewall_test_data'
USE_RANDOM_DATA=true
SIZE_BYTES=4096
Creating new tests #
As new functionality is added, new tests should be created. This provides some assurance that new changes don’t have unforeseen consequences, which is particularly important for a complex system like the firewall.
The autotest.sh script leverages the shUnit2 testing framework for setup,
tear down and temporary file handling; the framework’s documentation is
available here.
To create a new test, a shell function that begins with the word test should
be added to autotest.sh. When autotest.sh is first executed, a list of tests
to execute is generated, which contains all of the functions that begin with the
word test. A test is considered to have passed if its function returns a 0
exit status and failure otherwise. The last command or function executed within
a test function will determine its exit status if an explicit return value is
not provided.
To indicate test failure, we use shUnit2’s fail function, where its argument
is a string containing the reason for test failure. For example,
fail 'This test has not succeeded.'
would result in
ASSERT: This test has not succeeded.
being output and would increase the test failure count (to be reported once all
tests have executed). An important note is that executing fail does not exit
the current test; we must explicitly return to stop executing a test, which is
crucial if a test has several failure points. The fail function returns a
non-zero exit status. The print_log function should typically follow each
fail call so that firewall debug output can be displayed if enabled.
For tests that involve waiting for a timeout of some kind, it is reccomended
to notify the user of the typical duration using the print_info function.